0

Let´s talk a bit about nutrition: OLIVES

Hi guys.

After a long break i decided to post again ..but this time something a bit different … something about nutrition.There are many topics that can be discussed here bu today i will post something about olives…. black olives ! I read recently an article about this and i found it very interesting and i also discovered things i didn´t know .

So…black olives are very good for people that suffer from anemia due to its increased level of iron.

Olives can be found in different shapes,colours and sizes.These are classified according to their use, such as for the production of olive oil, etc.

Properties :

Olives have a high nutritional value and a high protein content (1.6 percent), vitamins and minerals and essential amino acids necessary for human body. They have 50 % water, 22 % fat and 8 % fiber. The content of fatty acids varies depending on the maturation of the olives. When they reached to fully maturity, olives,contain oleic acid , Omega 3,Omega 6, fatty palmitoleic, palmitic and stearic acid.

The caloric value of olives exeeds 9 calories per unit,which makes them the ideal ingredient for any weight loss program.

We can also find minerals like phosphor, magnesium,iron,sodium,calcium, potasium and iodine and vitamines like A,B and E.

Black olives are highly recommened for cases of anemia due to the increased level of iron ( black olives contain more iron than then green ones ).Also the high content of non-saturated fat increases the good cholesterol.

Vitamins A,B and E helps to strenghten the cardiovascular function,eyes and mucous membrane.Vitmain B is very important in the metabolizacion process of carbohydrates.Calcium content in olives helps coagulation, the blood and consolidating bone structure of the body.

Olives have a range of benefits for the organism. For this reason, experts recommend a contribution of seven olives in each and every day. Because of low level of calories, the people who are struggling with excess weight, olives may be used as a method to reduce stress and anxiety.

By means of the integration on a regular basis of the olives in your diet, you can enjoy stimulating digestive processes, also help digestion by an increase in production of gastric juices. In the event that a person is suffering from gallstone  it is recommended  a prudent imput of olives.

Contra-indications for the use of olives:

Despite the fact that they are so beneficial in the fight for the control colesterolui and of triglycerides, black olives and green ones are subjected to a treatment before shown up on the market, in which it is used a solution with a large amount of sodium.

It is for this reason that it is not recommended that high consumption by persons who have problems with hypertension status without being washed and rinsed several times with water.

All in all, try to combine olives with all kinds of food and salads.


0

Estiramientos o Streching

Hola a todos!
Hace tiempo que no he escrito nada y ya es tiempo para volver con articulos!

Hoy hablamos sobre estiramientos, que es un estiramiento,los beneficios de los estiramientos,que tipos de estiramiento hay…

Para empezar vamos a ver que es el estiramiento o streching :
Los estiramientos son los ejercicios de intensidad suave y mantenida, con el objetivo de preparar nuestra musculatura para esfuerzos mayores, o simplemente de vuelta a la calma, pues ya acabamos la actividad que hemos realizado, y a su vez para ayudar a aumentar el rango de movimiento de nuestras articulaciones.
Los estiramientos suelen ser ejercicios destinados a tal fin. Estos ejercicios de estiramientos pueden ser organizados por la forma de realizar dicho estiramiento, por el objetivo buscado, por las articulaciones implicadas o por los músculos elongados.
Los estiramientos y la ciencia que lo estudia pertenecen al ámbito deportivo general. Algunas capacidades musculares necesitan ser trabajadas en todos los deportes. Ya sean deportes de resistencia de velocidad o de fuerza. Los estiramientos son comunes a todos los deportes, las diferencian estriban en las zonas que más se ha de trabajar o la forma específica de trabajo.

A continuación, expondré algunos beneficios de éstos estiramientos:

-Previene el endurecimiento de nuestra musculatura en la fase final de nuestra actividad física.
-Evita, previene o debilita la frecuencia de lesiones más comunes.
-Aumenta la flexibilidad de nuestra musculatura.
-Aumenta el rango de movimiento de nuestras articulaciones.
-Reduce la tensión de nuestros músculos al haber realizado actividad física, y ayuda a volver a activar el riego sanguíneo de nuestros músculos.
-Mejora la coordinación entre la musculatura de nuestro cuerpo.
-Cuando nosotros realizamos una actividad física, ya sea moderada o intensa, en nuestra musculatura se acumula ácido láctico, que es esa “pesadez” rígida que notamos, sobretodo donde más la notamos es en nuestras piernas. Bien, pues el realizar estiramientos, ayuda a disminuir ésta acumulación de ácido láctico, producida por nuestro cuerpo.
-Los estiramientos posteriores al entreno favorecen la recuperación muscular.
-Mejora la apariencia personal y estética, y nos hace sentirnos mejor.
-Mejora la alineación y correcta postura corporal.


Que se estira o que se debe estirar

Cuando realizamos un ejercicio de estiramiento, estamos alongando el musculo y estirando los tendones y tejido conectivo. Cualquier ejercicio que se haga se realiza sobre una articulación o si se trata de un ejercicio integral se realiza sobre varias articulaciones. Dentro de la articulación podemos diferenciar realizando el ejercicio adecuado un grupo o un musculo en particular.

Por ejemplo, podemos realizar un ejercicio de estiramiento de la articulación del hombro, de la cadera o de la rodilla y trabajar específicamente uno los músculos que actúan sobre esa articulación. En los casos anteriores podríamos realizar un ejercicio de estiramiento del tríceps, para el caso del hombro. Un ejercicio de estiramiento de isquiotibiales para el caso de la cadera o un ejercicio de cuádriceps para el caso de la rodilla.

Que no se estirar o cuando no estirar

Por norma no se debe realizar ningún ejercicio en los que:
* Sientas dolor.
* La postura te resulte incomoda.
* Realizar ejercicios en articulaciones laxas.
* Sobre articulaciones que han sufrido recientemente un esguince, torsión o rotura.
* Si se padece cualquier grado de osteoporosis. (consultar con el médico).
* Articulaciones inflamadas.

Tipos de estiramientos:

>Estático: Consisten en estirar en reposo, se estira el musculo hasta una determinada posición y se mantiene durante 10 a 30 segundos. Implica estirar hasta el limite de lo confortable.
>Dinámico: Consisten en estirar dando impulso pero sin exceder los limites de los estiramientos estáticos.
>Activo:
Es un tipo de estiramiento estático, consiste en estirar usando el musculo antagonista sin asistencia externa.
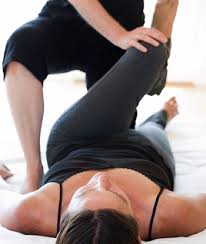
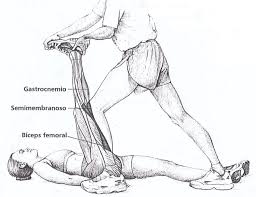
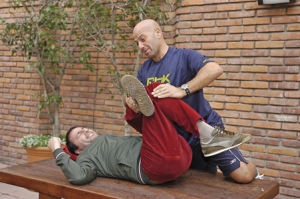
>Pasivo: Es un tipo de estiramiento estático en el que ejerce una fuerza externa (compañero, fisioterapeuta,…) sobre el miembro a estirar.
>Balísitico:
Es como el estiramiento dinámico pero forzando los limites de los musculares. Se realiza de forma rápida y con rebotes.
>Isométrico: Es un tipo de estiramiento estático en el que los músculos implicados hacen fuerza en contra del estiramiento, se tensan los músculos implicados para reducir la tensión.
>PNF
(Facilitación neuromuscular propioceptiva o FNP): Es una técnica combinación de estiramiento estático e isométrico, consiste en a) un estiramiento estático seguido de b) una contracción isométrica contra resistencia desde la posición de estiramiento, a continuación tiene lugar c) una relajación seguida de d) un nuevo estiramiento estático que incrementa el rango de movimiento.

A continuación, indicaré algunos consejos a tener en cuenta en los estiramientos:

-Realizar estiramientos unos 3/4/5 veces por semana, incluyendo 5 si tenemos un nivel mayor de forma física.
-Se deben estirar la mayoría de grupos musculares de nuestro cuerpo (cuanto más músculos impliquemos, mucho mejor).
-Hay que recordar que en su fase final, los estiramientos son la “vuelta a la calma”, la vuelta a la relajación, por lo tanto, se deben realizar de forma lenta y pausada.
-Cuando estiramos, no debemos forzar la musculatura que estamos estirando hasta sentir dolor, simplemente debemos llegar al límite cuando notamos que nos “tira” el músculo, ni realizar movimientos antinaturales.
-La postura de cada estiramiento es de unos 20”-25”, no se recomienda más tiempo.
-No se requiere mucha dedicación de tiempo, ya que con 5’-15’ diarios hay suficiente.
-Los podemos realizar incluso 2 veces al día cuando estiramos, por ejemplo una vez por la mañana y otra por la tarde.
-Se aconseja tener una variedad de ejercicios por cada grupo muscular.
-En los centros deportivos, incluso existen actividades dirigidas expresamente de estiramientos, o stretching.

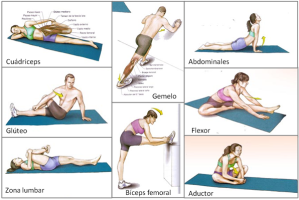
Seguidamente, os dejaré algunas plantillas de estiramientos, en la que se estiran diferentes grupos musculares:

estiramientos-para-padel-del-tren-superior

Tabla Estiramientos Tren Inferior Padel

tabla estiramientos

11838445-tres-gimnasio-ejercicio-y-estiramiento

Estirando 002ab

images (1)

MART3


Y algunos estiramientos asistidos :

download

download (2)

download (1)

2e3eda54db1fa615dea222efdd1f2411

fisiokinesiterapia-spalla1-300x200

flexibilidad01

images (2)

images (3)

images (4)

images

oDSC_0590

streetching

vc06

vc08

stock-photo-fitness-home-and-diet-concept-smiling-teenage-girl-streching-at-home-187289210

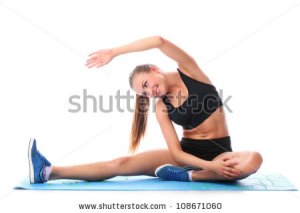
stock-photo-happy-girl-doing-fitness-exercises-over-white-background-108671060

stock-photo-yoga-stretching-173582543

stock-photo-young-girl-doing-streching-exercises-over-white-background-107609972

stock-photo-young-woman-streching-muscles-functional-training-170324969

stock-photo-young-woman-streching-muscles-functional-training-167886638

stock-photo-young-woman-streching-muscles-functional-training-160655120

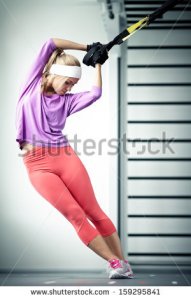
stock-photo-young-woman-streching-muscles-functional-training-159295841

stock-photo-young-woman-streching-in-the-park-138504254

stock-vector-yoga-at-the-office-147150824

stock-vector-office-yoga-143609443

stock-vector-office-yoga-143609371

Espero que os haya gustado el articulo!

Don´t forget to strech!!

Photos courtsey of: http://www.shutterstock.com/

0

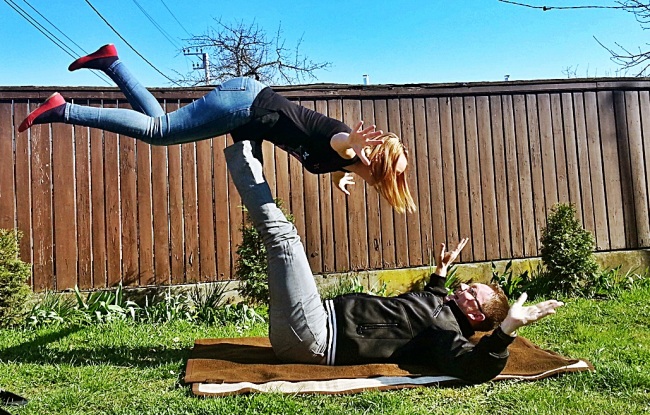
Yoga for couples :)

Who says you can´t do some yoga and have some relaxing and fun time with your beloved one?

Here are some yoga poses for couples!! 

Enjoyyyy 🙂 


ImageImage


ImageImageImageImage


Partner/Acro Yoga taken in Pure Energy Yoga, Utrecht, Netherlands by Franck Wagemakers


Young healthy couple in yoga position on white background - stock photo

Young couple in yoga pose - stock photo


Young couple in yoga pose - stock photo

Young couple in yoga pose - stock photo


0

Yoga poses for core :)

Here are some yoga exercises for strenghtening your core . By streching and strenghtening your core ,every activity will be easire for you ! 

Some of the many benefits of yoga are : 

  • strong core -> which in turn protects your spine,improves your posture,balance and stabilty
  • reduces back pain
  • gives you a beautifully taut midsection

This routine targets every part of your core: front, back, and side-to-side. Try it out once a day to feel strong and fabulous in your swimsuit all summer ( or year ) long!!

I tried some of these poses and they are helpful and relaxing 😀  can´t wait to try all of them ! 

Hope they will be helpful and stay tunned for more articles about yoga !

Enjoy!!


Amazingly fit and beautiful mature woman doing an advanced pilates move. - stock photo


Woman practicing yoga at home standing on a mat on her living room floor while watching and participating in a class - stock photo


Woman doing abdominal crunches on exercise - stock photo


Fit blonde doing pilates core exercise in studio - stock photo


Woman practicing yoga at home standing on a mat on her living room floor while watching and participating in a class - stock photo


Adult female yoga practitioner. Studio shot over white. - stock photo


Yoga - young beautiful woman yoga instructor doing Full Boat pose asana (Paripurna navasana) exercise isolated on white background - stock photo


Focused sporty woman lying on blue exercise mat doing exercises in sports hall - stock photo


Side view of beautiful woman doing yoga in a park lying on a lawn - stock photo


Woman in Wild Thing Yoga Pose  - stock photo


illustration of push ups on fitness core training ball with push up bars by attractive middle age fitness trainer teacher woman exercising and stretching - stock photo


Woman in Lunge Twist Yoga Pose - stock photo


Young beautiful woman doing core workout - stock photo


Happy women doing core exercise on mats in fitness studio - stock photo


Woman in Plow Yoga Pose  - stock photo


Woman in One Legged Downward Facing Dog Yoga Pose - stock photo


Women who are training - stock photo


Photos courtsey of : http://www.shutterstock.com/   

14

Gluteus Medius eccentric exercises

The gluteus medius , one of the three gluteal muscles, is a broad, thick, radiating muscle, situated on the outer surface of the pelvis.

File:Gluteus medius muscle - animation01.gif    File:Gluteus medius muscle - animation04.gif

Origin:

– outer surface of illium, between the posterior and anterior gluteal lines.

Inseration:

-lateral and superior surfaces of the greater trochanter of femur.

Action : on the tigh ( femur )

– abduction

– medial rotation

-lateral rotation


Gluteus medius strengthening

Gluteus medius eccentric loading exercise

The aim of this exercise is to work the tendon of the gluteus medius muscle on the outside of the hip in a very specific way. The tendon and muscle are worked whilst they are being lengthened, not while they are contracting.This is what eccentric loading means.

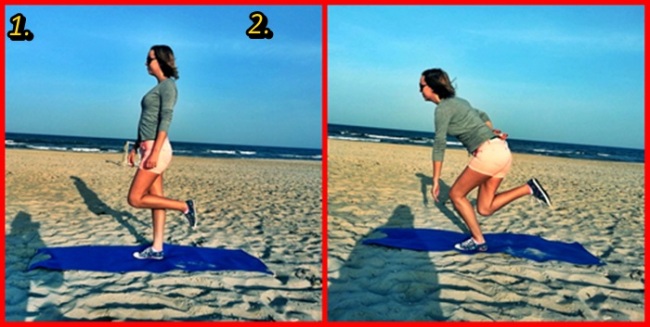
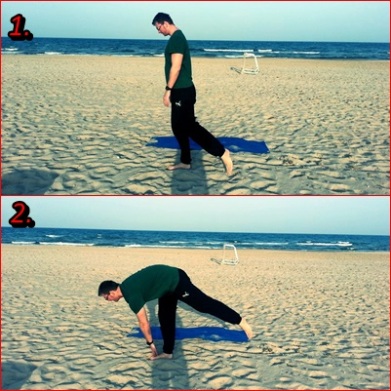
Stand squarely on the floor next to a wall good leg facing the wall.  ( see pic. 1)

Using your arms and your good leg, but not your bad leg, lift your pelvis up so that you are tipped over towards your bad side. On tip toes on your good side. ( see pic. 2)

Now lift you good leg off the floorbending at the knee. Slowly and gradually lower your pelvis so that you are tipped over to your good side stretching your bad side. Use only the muscles (gluteus medius) only your bad hip to control the decent. You can use your hands to steady yourself, but the idea is that your bad hip is taking all of your body weight as you tip over and gradually lowering you down as far as you can go. ( pic 3 )

Return to the start position using your good leg and arms, but not using your bad leg.   The bad side works only on the way down, not the way up.

Repeat 10 times and have a rest.

Aim for 3 sets of 10 exercises morning and evening, but be guided by your discomfort. It is normal to ‘feel’ the exercise, but it should not be really painful. If it is not to bad you can do more repetitions. If it is very uncomfortable you should do fewer repetitions.

Other exercises :

One leg squat : ( you can help yourself with a chair )

Image

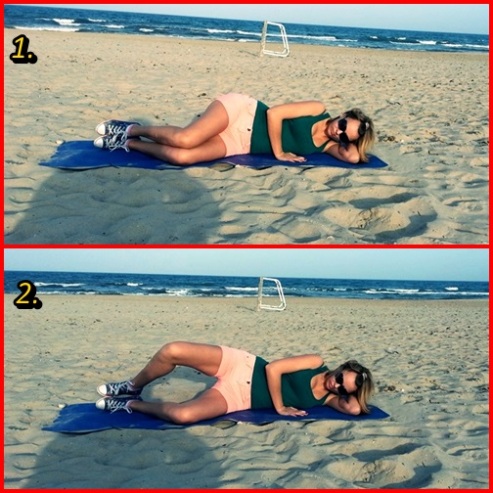
Side-lying abduction

Image

Side plank abduction

This is reproduced from Boren et al. 2011 who did an excellent study and also compared their results with earlier work. Their top 3 exercises for Glute Medius were side plank abduction with dominant leg down, side plank abduction with dominant leg up and single leg squat (in that order). Notice again that these positions, despite being “non-functional” do create a lot of activity in Glute Medius and again more so than weight bearing positions such as single leg squat. Of note too is that they found less activity with side-lying abduction than the previous studies. This raises a good point with research and rehab. Nothing is concrete. You simply cannot say “this exercise has no role” as you will find evidence to support your claim and evidence to refute it. Also they used a slightly different technique which might account for the difference.

The Clam

Single Limb Squat

Front Plank

Image

Image

Image

ImageImage

Single leg balance- focus should be on maintaining a level pelvis without adducting the hip. Use support initially if needed. Aim for 10-15 seconds, repeat 5-10 times (stop if painful).

Running may need to be avoided or at least reduced during a reactive tendinopathy. This is the last thing you want as a runner but may be a necessity in early management of GT. The issue with tendinopathy is that if you continue to overload the tendon it can progress from a reactive tendon, to dysrepair and degeneration during which stages the tendon structure starts to change. Reactive changes are reversible but degeneration of the tendon generally isn’t. That doesn’t mean it can’t be managed it’s just better to prevent it happening in the first place!

In mild cases you may continue to run but try to ensure running remains pain free and there is no reaction for at least 24 hours after. Your Physio should guide you on continuing to run and/ or returning to running after rehab

Tips :

  • Try to find the exercises that best suit you and the ones that bast work for you.  If you find sidelying exercises are getting you results without causing symptoms then great. If not try some of the others above and see which ones seem to work your glutes and get results.
  • Try to do 3 sets of 10-15 reps with a 1-2 minute break between the sets.
  • Then progress up towards 20-25 repetitions, you’re aiming to fatigue the muscle so there will be lots of individual variation in the reps needed to do that. That said if you can do more than 30 reps without fatigue than try to find a harder exercise.

The best advice is to see a Physio who can assess you and provide appropriate exercises and help you perfect the technique.

Information and Pictures courtsey of :

6

Osteoarthritis

Osteoarthritis (OA) is one of the most common forms of arthritis.  It is a chronic condition in which the material that cushions the joints, called cartilage, breaks down. This causes the bones to rub against each other, causing stiffness, pain and loss of joint movement. The cause is not fully understood.

Signs and symptoms :

Osteoarthritis symptoms usually develop gradually. At first, there may be soreness or stiffness that seems more like a nuisance than a medical concern. 

Common symptoms include:

  • Sore or stiff joints – particularly the hips, knees, and lower back — after inactivity or overuse
  • Stiffness after resting that goes away after movement
  • Pain that is worse after activity or toward the end of the day.

Signs :

  • pain with activity, but relieved with rest
  • joint stiffness,especially in the morning when the body is cold
  • crepitus- a grating sensation
  • mild joint swelling

Osteoarthritis, or OA, may also affect the neck, small finger joints, the base of the thumb, ankle, and big toe. The pain may be moderate and come and go, without affecting the ability to perform daily tasks.  Some people’s OA will never progress past this early stage. Others will have their OA get worse. The pain and stiffness of more severe osteoarthritis may make it difficult to walk, climb stairs, sleep, or perform other daily tasks. 

Causes :

  • changes in joint mechanincs
  • repeated trauma to the joint ( lifting,running )
  • direct blow
  • aging – common amoung older patients and progresses with age

Diagnosis :

If you are suffering of OA ,the doctor will ask questions about your medical history and perform a physical exam and, possibly, take X-rays to confirm the diagnosis. 

Treatment :

  1. medication
  2. heat and / or cold treatments
  3. streching to maintain flexibility
  4. water exercises to maintain mobility
  5. low or no impact cardiorespiratory conditioning 
  6. physical therapy
Self-Care

Staying physically active and maintaining a healthy weight are the keys to living well with osteoarthritis. Too little movement can lead to stiffness and weak joints. Losing one pound can take four pounds of pressure off your knee joints.  Overall fitness improves health in many ways. Strong muscles protect joints. An OA management plan also involves eating a nutritious diet, managing stress and depression, and getting a good balance of rest and activity each day.


0

Bursitis

Bursitis is the inflammation of one or more bursae (small sacs) of synovial fluid in the body. The bursae rest at the points where internal functionaries, such as muscles and tendons, slide across bone. Healthy bursae create a smooth, almost frictionless functional gliding surface making normal movement painless. When bursitis occurs, however, movement relying upon the inflamed bursa becomes difficult and painful. Moreover, movement of tendons and muscles over the inflamed bursa aggravates its inflammation, perpetuating the problem. Muscle can also be stiffened.

Bursae- are fluid filled membrane sacs that serve as buffers between tendon and bone, skin and bone or between two bones.  They act as lubrificators to decrease friction.

Causes :

  • repetitive movement and excesive pressure : shoulders, elbows and knees are the most commonly affected
  • Inflammation of the bursae might also be caused by other inflammatory conditions such as rheumatoid arthritis and gout
  • traumatic injuries : the inflammation irritates because the bursa no longer fits in the original small area between the bone and the functionary muscle or tendon. When the bone increases pressure upon the bursa, bursitis results.

Signs :

  • pain due to increased fluid production : as fluid accumulates,pressure builds causing pain
  • swelling
  • decreased ROM ( range of motion )
  • loss of function

Treatment :

– follow the inflammation treatment protocol ( ITP  )   -> u can revise it in the Inflammation topic of my blog

Bursae that are not infected can be treated with rest, ice, elevation, physiotherapyanti-inflammatory drugs and pain medication. Since bursitis is caused by increased friction from the adjacent structures, a compression bandage is not suggested because compression would create more friction around the joint. Advanced massage therapy techniques can also be employed to help with the inflammatory process of bursitis.Bursae that are infected require further investigation and antibiotic therapy. In cases when all conservative treatment fails, surgical therapy may be necessary. In a bursectomy the bursa is cut out either endoscopically or with open surgery. The bursa grows back in place after a couple of weeks but without any inflammatory component.


3

Yoga for Lower Back Pain

To understand how stretching can improve or aggravate disc problems, let’s look at how a disc works and how it gets damaged. Intervertebral discs function as shock absorbers, cushioning the brain from jarring as we walk, run, and jump. Each disc consists of two parts: the inner disc, the nucleus pulposus, made of a shock-absorbing gel-like substance, and the annulus fibrosis, the rings of ligament that surround and support the center.

A normal lumbar spine has a mild curve forward, and in this position, weight is evenly distributed throughout each disc. During toe-touching, the lower back flexes, losing its normal curve, and more weight is put on the front of the discs. The gel-like centers get pushed backward, into the now stretching support ligaments. While this can happen during forward bending even if a person tends to have excessive lumbar curve (“swayback”), it is especially problematic if the spine has lost the normal curve and become flattened.

With repetition, or if great force is applied as in heavy lifting, the ligaments weaken and may “bulge” like a bubble in the wall of a tire. Or the ligaments may tear, allowing the gel-like inner disc to leak out, resulting in a herniated disc. The bulging or herniated disc may cause lower back pain or, if it is pressing on an adjacent nerve, pain can be referred into the hip and leg. Bulging and herniated discs may be treated conservatively, with physical therapy, exercise, and other noninvasive treatments, but a badly herniated disc is a serious medical problem which may require surgery and a lengthy recovery period.

While heavy lifting is a well-known cause of back injuries, disc damage is just as frequently caused by the smaller but repetitious forward-bending movements we make during daily activities at work and at home. For most of us, half of our body weight is above the waist. Just as a child “weighs more” as he or she slides away from the center to sit at the end of a teeter-totter, our own upper body weight exerts greater force at the disc as we bend farther forward. This tremendous force on the disc, added to the strain on the supporting ligaments, sets the stage for damage.

In our society, opportunities abound for repetitive forward bending: child care, yardwork, housework, shopping. Even sedentary work may exert strain on the lower back; for example, someone bending and twisting from a sitting position to lift a heavy object out of a bottom desk drawer. The greater the weight being lifted (and the weight of one’s own body), the greater the pressure on the disc.

Forward bending activities, especially combined with lifting, are also the most common cause of back “strain.” While much less serious than disc injuries, back strain is responsible for most of our lower back pain, including the Monday morning ache after weekend gardening.

Lower Back Pain Relief Yoga Sequence


1. Supine Hamstring Stretch


back pain, low back pain, yoga for back pain, back pain relief, yoga for back

Lying on your back, bend your right knee into your chest and place a strap or rolled-up towel around the ball of your foot. Straighten your leg toward the ceiling. Press out through both heels. If the lower back feels strained, bend the left knee and place the foot on the ground.Hold for 3-5 minutes and then switch to the left let for 3-5 minutes.


2. Two-Knee Twist


back pain, low back pain, yoga for back pain, back pain relief, yoga for back

Lying on your back, bend your knees into your chest and bring your arms out at a T. As you exhale lower your knees to ground on the right. Keep both shoulders pressing down firmly. If the left shoulder lifts, lower your knees further away from the right arm. Hold for 1-2 minutes each side.


3. Sphinx


back pain, low back pain, yoga for back pain, back pain relief, yoga for back

Lying on your stomach, prop yourself up on your forearms. Align your elbows directly under your shoulders. Press firmly through your palms and the tops of your feet. Press your pubic bone forward. You will feel sensations in your lower back, but breathe through it. You are allowing blood flow into the lower back for healing.Hold for 1-3 minutes.


4A. Pigeon


back pain, low back pain, yoga for back pain, back pain relief, yoga for back

From all-fours, bring your right knee behind your right wrist with your lower leg at a diagonal toward your left hip. Square off your hips toward the ground. Bend forward. Widen the elbows and place one hand on top of the other as a pillow for your forehead. Hold 2-3 minutes and then switch to the left side for 2-3 minutes.


If pigeon pose bothers your knees, then do Thread the Needle.


4B. Thread the Needle


back pain, low back pain, yoga for back pain, back pain relief, yoga for back

Lying on your back, bend both knees with the feet flat on the ground. Bend the right knee like a figure four, with the outer left ankle to the right thigh. Lift the left foot into the air, bringing the left calf parallel to the ground. Thread your right hand between the opening of the legs and interlace your hands behind your left thigh. Hold 2-3 minutes and then repeat on the other side.


5. Legs Up the Wall


back pain, low back pain, yoga for back pain, back pain relief, yoga for back

Scoot your buttocks all the way into the wall and swing your feet up the wall. This pose is excellent for relaxing the muscles of the lower back and drains stagnant fluid from the feet and ankles. Do this pose after a challenging workout and always after traveling by plane.Hold for 5-10 minutes.


Other YOGA POSES for LOWER BACK PAIN


1. “This sequence is very safe for people with lower-back issues and can help to alleviate pain when done regularly,” says Jean Koerner who has been teaching yoga for 20 years and is currently an instructor at ISHTA Yoga in New York City. ISHTA is a Sanskrit word for “personalized practice,” and this routine is customized for back-pain sufferers.


2. RECLINING TWIST ( a )

Next, inhale, draw your knees into your chest, and as you exhale, lower your knees to the right, keeping them at hip level.


3.RECLINING TWIST ( b )

 Lie on your back with your knees bent, feet flat on the floor, hip-width apart and 4 to 6 inches away from your sit bones. Open the arms out to the sides, even with your shoulders, palms facing up. Then lift your hips and shift them over 4 inches to the left, setting yourself off center.


4.BRIDGE POSE

 Lie on your back with your feet flat on floor, palms facing down. Lift your hips and torso off the floor, pressing into your palms and feet. Then interlace your hands under your hips and press your shoulders and upper arms into the floor, lifting your hips higher toward the ceiling. As your breastbone rises toward your chin, move your chin back a little away from your chest. Hold for six to eight breaths. Then lower yourself slowly rolling down from the top of your spine to your tailbone. Rest for four breaths before repeating.


5. Extended side angle pose

Stand with your feet about 4 feet apart and raise your arms out to your sides, shoulder height, with your palms facing down. Turn your left foot and leg out 90 degrees to the left and your right foot in about 15 to 30 degrees. Inhale, and as you exhale bend your left knee up to 90 degrees, keeping your knee stacked over your heel. Place the top of your left forearm on your left thigh and roll your chest open toward the ceiling. Raise your right hand straight up and turn your head to look at it. Hold for five breaths. Then carefully come out of the pose and repeat on the opposite side.


6.Warrior II pose

 Stand with your feet about 4 feet apart and raise your arms out to the sides at shoulder height, palms facing down. Then turn your left foot and leg 90 degrees out to the left and your right foot in about 15 to 30 degrees. Inhale, and as you exhale bend your left knee up to 90 degrees, keeping your knee stacked over your heel. To further protect your knee, center it over the middle of your foot, so it’s pointing over your second and third toes. Then turn your face to the left and gaze out over your left hand. Hold for five breaths before straightening up and repeating on the opposite side.


7.MOUNTAIN POSE 

From down dog, keep the hands planted on the floor, but walk the feet towards the hands. Hold for 5 breaths. 
2. Then, start at the tailbone and move to standing by rolling up the back vertebrae by vertebrae. Keep the feet pressing into the floor and come to a standing position with feet hip-distance apart and pointing forward.


8.PLANK POSE

From down dog, lower your hips so your body is in a high pushup position with your hips connecting the straight line between your shoulders and ankles (i.e., not drooping toward the floor). Engage your abdominals and hold for five breaths. Then lift the hips back into down dog and hold for five breaths. Next move inhale into plank and exhale back to down dog, repeating five times to warm up your shoulders.


9.DOWNFACING-DOG POSITION

From all fours, curl your toes under. Inhale, and as you exhale, push your hands into the floor, lift your knees, and lift your hips back and up. Push the tops of your thighs back so your body looks like an inverted “V.” Keep knees bent if needed to keep your spine long and straight. Hold for 1 minute.


10.CAT-COW SEQUENCE ( B)

Exhale and point your toes. Round through your lower back, pressing your palms into the floor and tilt the top of your head down, releasing the tension from the upper back and neck. Repeat for six full breaths.


11.CAT- COW POSE ( A )

Begin on all fours with your hands under your shoulders and knees under your hips. Inhale and curl your toes under. Tilt your pelvis toward the ceiling, turning your sit bones up, draw the shoulder blades down the back, open through the chest and look a little forward keeping the neck curve long.


12.CORPSE POSE

Lie comfortably on your back on the floor with your arms separated at a 45-degree angle from your body, palms facing up. Let your legs rest as wide apart as feels comfortable. And allow your feet to relax and roll open. Then release all tension from every part of your body. Place a bolster or large cushion under your thighs or knees if you have any discomfort in your lower back in this pose. Stay here for 5 minutes (set an alarm clock if you need to).


Enjoy ! 


Photos courtesy of Shutterstock and Women´s Health ( http://www.womenshealthmag.com/ )


4

Tendinosis

Tendinosis – a chronic degeneration of the tendon caused by repeated microtears. This is not an inflammatory condition,and may not respond well to an anti-inflammatory protocol ( ITP).

Tendinosis is a degeneration of the tendon’s collagen in response to chronic overuse; when overuse is continued without giving the tendon time to heal and rest, such as with repetitive strain injury, tendinosis results. Even tiny movements, such as clicking a mouse, can cause tendinosis, when done repeatedly.

Diagnosis:

Swelling in a region of micro damage or partial tear may be detected visually or by touch. Increased water content and disorganized collagen matrix in tendon lesions may be detected byultrasonography or magnetic resonance imaging.

Symptoms can vary from an ache or pain and stiffness to the local area of the tendon, or a burning that surrounds the whole joint around the inflamed tendon. With this condition, the pain is usually worse during and after activity, and the tendon and joint area can become stiffer the following day as swelling impinges on the movement of the tendon. Many patients report stressful situations in their life in correlation with the beginnings of pain, which may contribute to the symptoms.

Treatment:

Tendons are very slow to heal if injured. Partial tears heal by the rapid production of disorganized type-III collagen, which is weaker than normal tendon. Recurrence of injury in the damaged region of tendon is common.

Physical therapy, rest, and gradual return to the activity in which tendinosis was experienced is a common therapy. There is evidence to suggest that tendinosis is not an inflammatory disorder; anti-inflammatory drugs are not an effective treatment,and inflammation is not the cause of this type of tendon dysfunction.There is a variety of treatment options, but more research is necessary to determine their effectiveness. Initial recovery is usually within 2 to 3 months, and full recovery usually within 3 to 6 months. About 80% of patients will fully recover within 12 months. If the conservative therapy doesn’t work, then surgery can be an option. This surgery consists of the excision of abnormal tissue. Time required to recover from surgery is about 4 to 6 months.

Treatment and self-care recommendations for tendinosis include:

  • rest (  With repetitive work tasks, the patient is recommended to take a break for one minute every 15 minutes and a five-minute break every 20–30 minutes.This reduction isn’t much considering its role in preventing long-term pain and disability. Some people will need to rest even more than this at the start of treatment. The patient should be advised to stay aware of their body as it heals. If the activity they are engaging in is causing pain, then they are probably doing too much.)
  • adjust ergonomics and biomechanics( example: a person that types a lot on the computer should find a neutral position for their wrists to rest while typing)
  • use appropriate support ( bracing,taping)
  • strech and keep moving though conservatively ( Lightly stretching and moving the affected area through its natural range of motion while minimizing pain will prevent shortening of the related muscles (preserving active range of motion and flexibility). It can also increase circulation, thereby assisting the healing process. Stretching can also elongate the muscle-tendon unit, reducing the tension placed on the tendon during activity, thereby reducing the chemical changes that cause degeneration)
  • apply ice (  Ice causes vasoconstriction and is thought to address the abnormal neovascularization of the tendon tissue. Clinical experience indicates that icing is helpful for tendinopathies even though the reason why it works is not yet fully understood. Use ice for 15–20 minutes several times a day (allowing for at least 45 minutes in between icing session), and after engaging in activities that utilize the tendon)
  • eccentric strenghtening ( An eccentric strengthening regimen done 1–2 times daily for 12 weeks has been clinically proven to be a very successful treatment for tendinosis, especially when the exercises are performed slowly. Eccentric strengthening is “lengthening a muscle while it is loaded and contracting. For example, lengthening one’s bicep while holding a dumb-bell in one’s hand would stimulate eccentric contraction. Eccentric strengthening might also help to reduce ground substance and tendon volume (swelling/thickening). It can be helpful to consult with a physical therapist to maximize the benefit of strengthening exercises and to minimize the possibility of re-injury.)
  • masssage (  Massage stimulates circulation and cell activity, especially when done at the appropriate depth. Deep-friction massage applied to the tendon serves to stimulate fibroblast activity and generate new collagen.)
  • nutrition (  Vitamin C, manganese, and zinc are all important for the synthesis of collagen production.Vitamin B6 and Vitamin E have also been linked to tendon health. Patients might benefit from talking with their primary health care provider or a nutrition specialist to be sure their intake of these nutrients is sufficient )

While the cellular damage is unlikely to be reversed completely, these treatments and self-care recommendations can increase the strength of the tendon by stopping the cycle of injury, introducing healthy collagen into the area, addressing unhealthy vascular changes, and decreasing the over-abundance of ground substance. Proper treatment of tendinosis should eliminate or significantly decrease pain, increase range of motion, increase strength, and return the patient to pain-free, normal daily activities.

Tendinosis causes tissue changes that make the tendon more prone to injury, so it is important that the patient continue to take care of the compromised tendon once the initial phase of treatment is complete. Ongoing massage, stretching, strength training, and warming up before starting work or exercise can help to prevent re-injury and keep the tissue as healthy as possible.


0

Tendinitis

Tendons are cord-like structures located where a muscle narrows down to attach to a bone. The tendon is more fibrous and dense than the elastic, fleshy muscle. A tendon transmits the pull of the muscle to the bone to cause movement. Tendinitis is often very tender to the touch.

Tendinitis (also tendonitis), meaning inflammation of a tendon, is a type of tendinopathy often confused with the more common tendinosis, which has similar symptoms but requires different treatment.

The term tendinitis should be reserved for tendon injuries that involve larger-scale acute injuries accompanied by inflammation. Generally tendinitis is referred to by the body part involved, such as Achilles tendinitis (affecting the Achilles tendon), or patellar tendinitis (jumper’s knee, affecting the patellar tendon).


Types of Tendinitis :

Tendinitis injuries are common in the upper and lower limbs (including the rotator cuff attachments), and are less common in the hips and torso. Individual variation in frequency and severity of tendinitis will vary depending on the type, frequency and severity of exercise or use; for example, rock climbers tend to develop tendinitis in their fingers or elbows, swimmers in their shoulders.Achilles tendinitis is a common injury, particularly in sports that involve lunging and jumping, while Patellar tendinitis is a common among basketball and volleyball players owing to the amount of jumping and landing.

Diagnosis :

Symptoms can vary from aches or pains and local joint stiffness, to a burning that surrounds the whole joint around the inflamed tendon. In some cases, swelling occurs along with heat and redness, and there may be visible knots surrounding the joint. With this condition, the pain is usually worse during and after activity, and the tendon and joint area can become stiff the following day as muscles tighten from the movement of the tendon. Many patients report stressful situations in their life in correlation with the beginnings of pain which may contribute to the symptoms. If the symptoms of tendinitis last for several months or longer it is probably tendinosis.

Signs:

  • pain,but often ubsides when tendon is warmed-up and returns when cooled down
  • swelling
  • warm to the touch
  • decreased motion
  • decreased function
  • crepitus – grating or cracking sound caused by the inflamed tendon struggling to move through its covering

Causes : 

  • overuse ( gradual onset of syptoms )
  • acute ( symptoms lasting less than two weeks )
  • sub acute ( symptoms lasting two to six weeks )
  • chronic ( symptoms lasting longer than six weeks )
  • repeated muscle contraction causing the tendon to slide over the bone

Treatment:

Treatment of tendon injuries is largely conservative. Use of non-steroidal anti-inflammatory drugs (NSAIDs), rest, and gradual return to exercise is a common therapy. Resting assists in the prevention of further damage to the tendon. Ice, compression and elevation are also frequently recommended.

Physical therapyOccupational therapy, orthotics or braces may also be useful. Initial recovery is typically within 2 to 3 days and full recovery is within 4 to 6 weeks.

Steroid injections have not been shown to have long term benefits but have been shown to be more effective than NSAIDs in the short term.

  • correct the cause
  • cryotherapy ( usually after activity )
  • heat therapy ( prior activity )
  • anti-inflammatory medication
  • iontophoresis
  • ultrasound
  • electrical muscle stimulation
  • massage to improve the blood flow
  • streching and ROM( range of motion) exercises
  • muscle strenghtening including proprioceptive and kinesthetic exercises
  • support with atheltic tape
  • cortisone injections
  • rest
  • gradual return to activity
  • in worst case : surgery

The goals of treatment for tendinitis are to restore movement to the joint without pain and to maintain strength in surrounding muscles while giving the tissues time to heal. Adequate rest is crucial.  Returning too soon to the activity that caused the injury can lead to chronic tendinitis or torn tendons.

As an immediate treatment for tendinitis, doctors and physical therapists recommend the RICE program: rest, ice, compression, and elevation of the injured tendon. They may also suggest aspirin, ibuprofen, or other anti-inflammatory drugs to help inflammation and pain. Ultrasound and whirlpool treatments are useful for relaxing muscles and tendons, improving circulation, and promoting healing. Occasionally, your doctor may discuss injecting corticosteroids (a stronger anti-inflammatory drug) around the tendon.

A physical therapist can propose an exercise plan that rests the tendon while strengthening nearby muscle groups and maintaining overall muscle tone. Only gradually will you begin to exercise the tendon itself. Your program may also include “eccentric” exercises, in which you gradually strengthen the muscle while stretching, stopping at the first sign of pain. You may also work into easy stretching exercises, done several times a day.

Surgery may be necessary to release or repair the involved tendon in chronic cases that don’t respond to other interventions.


How can I prevent Tendinitis ?

Include warm-up and cool-down exercises and stretches in your exercise routine. As a general rule, a good warm-up is five minutes for every 30 minutes of planned exercise. So, one hour on the treadmill or elliptical trainer should be preceded by 10 minutes of warm-up. Vary your exercises and gently stretch all the muscles and tendons you are planning to exercise.

Overly ambitious exercise in an attempt to lose weight rapidly also can lead to tendinitis.